This is an old revision of the document!
Modifying Outfit Textures
Overview
This tutorial will walk you through the process of building a custom outfit for your model. While this isn't intended to be tutorial on Photoshop, we will be teaching you some useful techniques along the way that should come in handy with any kind of image editing. Specifially, we will be using layers, masks, free transforms, selections, blend modes and some paint tools. If you are using a different paint program that should be fine as most modern paint programs support PSD files with layers and have similar functionality.
This tutorial assumes that you have a basic understanding of the Customization Editor and access to a paint program like Photoshop.
Download the tutorial texture mod
The texture mod we will be using for this tutorial is insert the link here- call it outfit tutorial.
See installing texture mods for help on installing it.
You will also need the Photoshop PSD file. It can be downloaded link to psd file.
Once you have installed and activated the texture mod, you should have a folder underneath your “mod/activemod/” folder called “outfit_tutorial”. This will have three files in it:
- F_Top001_White.png - this is the texture that gets used in-game
- F_Top001_White.psd - this is the Photoshop file with all the layers
- F_Top001_White.txf - this file defines how the texture will be rendered in game (transparent, additive, etc)
Test the Mod on a Model
Before we get into the nitty gritty of messing with the texture. Let's confirm that the texture mod is showing up in-game.
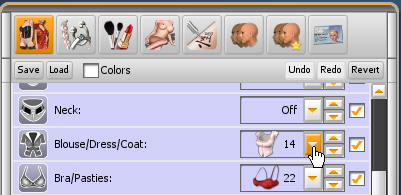 Go into the customization editor and open up the Blouse/Dress/Coat selector.
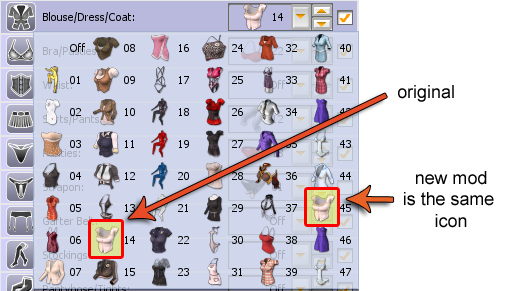
The modded version of the outfit will have the same icon as the default blouse. It will probably be in a different position based on the packages you have purchased and other mods that you may have installed. Look for the ![]() icon. It will be one of those if it is working properly.
icon. It will be one of those if it is working properly.
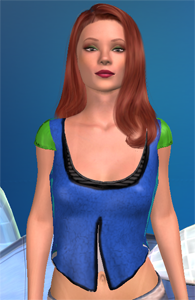 It should look like this on the model.
The PSD File
Let's take a look at the layers in the PSD file to get a sense of where we're going next.
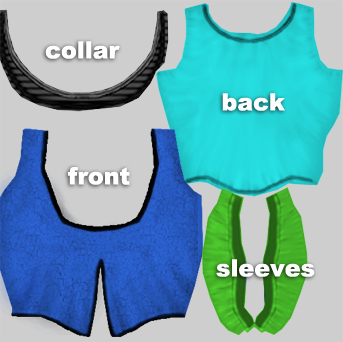 This is the “flattened” texture that is used by the game. The parts of the blouse are colored differently so we can identify them clearly.
IMPORTANT: The pieces of clothing cannot be moved around in this image or they won't show up in the correct place on the model!
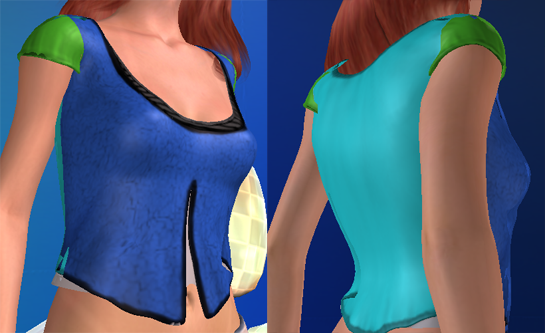 This is what the texture should look like on the model (front and back)
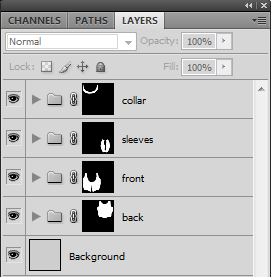
This PSD file has been broken into layers so it will be easy to modify. You can open up the Layers palette in Photoshop under “Window → Layers”
 Collar, sleeves, front and back are layer groups that contain other layers.
 Click the
  icon to show and hide layers
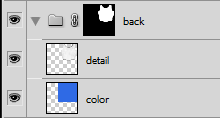 The “back” group can be opened up by clicking the little triangle.
 Inside the group are the “color” and “detail” layers.
 The “color” layer is the color of the back section. You can draw and paint on this layer to change the color of the back of the blouse.
 The “detail” layer is overlaid on top of the color layer. They “multiply” together to combine visually.
The “back” group also has a mask attached to it. That's the white shirt shape. If you think of the “back” group like a box, then the mask is like a hole in the box that lets you see inside. The “color” and “detail” layers are inside the “back” group so they are masked accordingly in the final image.
Change the Color
OK, let's take a crack at changing the color layer on the model.
 Pick the brush tool. It should be in your tools palette (use Window → Tools if you don't see the Tools palette)
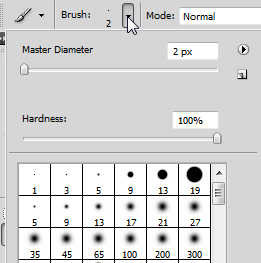 Get a bigger or different brush if you need it
 Pick a color
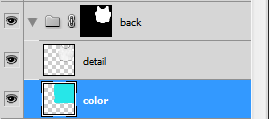 Select the color layer under the “back” group
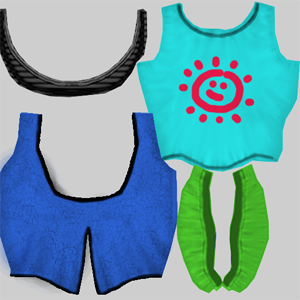 Draw something
Save the file. Select File → Save As from the menu. Save it over the F_Top001_White.png file in the Activemod folder.
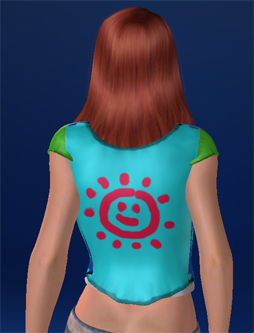 Now here's the fun part. Go back to the game and hit
  +
+ to reload the texture. Woo Hoo!
TIP: You can change the other parts by modifying the color textures under those groups (E.g. front). Try it!
Add a texture
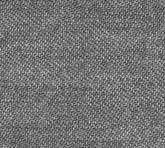 In the outfit_tutorial.zip file you will find a texture called “clothtexture.jpg”.
Drag it into your paint program.
TIP: For lots of free fabric textures check out http://cgtextures.com.
Type CTRL+a to select all or pick Select → All from the menu (if you're using Photoshop). This will select everything in the “clothtexture” image.
Type CTRL+c to copy the selection.
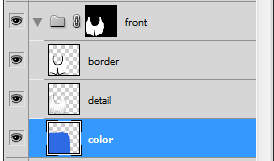 Switch to the outfit texture. Open up the “front” group and select the “color” layer.
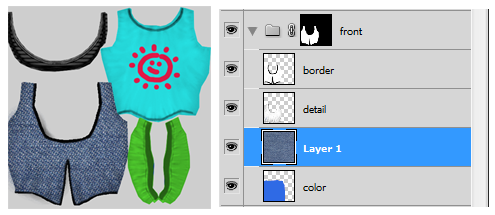 Type
Type  +
+ to paste the cloth texture as a new layer.
You should now see the jean texture instead of the color texture on the front. If you look at the layers, you can see that the cloth texture hasn't actually replaced the color texture. It has been added as a new layer above it. Layers that are above other layers will hide the layers below. Just like if you were stacking pieces of paper on top of each other.
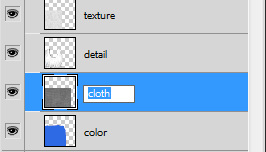 Take a moment to rename your new layer. Double click on the layer name to edit it. Hit
  when you're done editing.
The cloth texture is a bit too “zoomed in”. We'll adjust it in the next section so it fits better.
Transforming a Layer
With the cloth texture layer selected, type  +
+ or select Edit → Free Transform from the menu (in Photoshop)
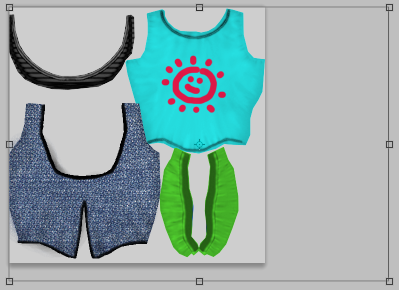 You should see the Free Transform control around the image.
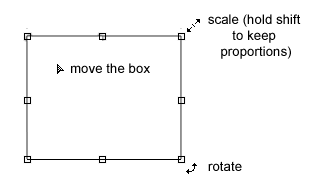
There are about a billion ways to use the Free Transform tool but we only care about the basics. If you hover your mouse around the edges of the tool you will see the cursor change to different symbols.
The  control will scale the image and the
  control will let you rotate it.
Use the Free Transform controls to scale the texture so it is smaller and fits the front piece better. When you are done, double click inside the tool to save your texture tweak. If you want to revert you can hit  +
+ to undo.
TIP: Hold down the SHIFT key while you are scaling to keep the proportions the same.
TIP: For a full reference of using the Free Transform tool check out this link.
Now would be a great time to save your image again (remember: Save As –> F_Top001_White.png). Then switch to Sexvilla and hit  +
+ to refresh the texture.
Multiplying and Other Blend Modes
We've managed to replace the color with a nice fabric texture but now it's a bit on the grey side. We're going to change the blend mode of the cloth texture layer so it can combine better with the color layer below it.
 Select the fabric texture layer and click the blend mode box at the top of the layers palette.
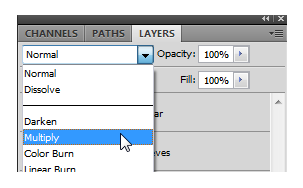 Select multiply mode.
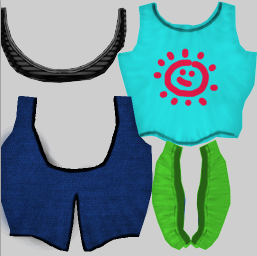 Voila! The cloth texture layer is now multiplying with the color below it.
What does this mean anyway?
Technically: When you multiply anything with black it will become black. If you multiply anything with white it will be unchanged.
Easy explanation: Anywhere the top image is dark, the bottom image will get dark as well.
If your top image is greyscale (no color) then multiplying won't change the colors in the bottom image. Color images will work as well. They will just be a bit less predictable.
The end result here is that we have kept the color and the texture information separate.
Try painting in the color layer again. You will see that the cloth texture is unaffected
Try out some of the other blend modes as well. Screen, Soft Light, Lighten and Overlay will give you similar but different blending effects. For this tutorial I'm going to set the blend mode to Soft Light as it looks pretty good.
TIP: For a full explanation of Photoshop blend modes check out http://www.myinkblog.com/2009/07/14/an-explanation-of-photoshop-blend-modes/
Make the Back Match the Front (optional)
- copy the cloth texture layer to the back group
- create a new layer above color
- copy the color from the front color layer
- turn off the layers above it to see the color
- use the eyedropper tool
- paint into the new layer
- select the brush tool
- NOTE: they won't match perfectly because the detail layers don't match
Changing Transparency/Opacity
We're going to take a quick look at changing the transparency/opacity of the fabric. You can change the transparency of different layers or of the entire group.
TIP: Opacity is the opposite of transparency. 0% opacity is the same as 100% transparency.
Let's start by changing the opacity of the cloth layer.
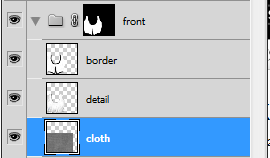 Select the cloth layer (assuming you renamed it to that)
 Click the opacity control at the top of the layers palette.
 Slide it around and observe how the cloth texture is fading in and out.
You can change the opacity of each layer individually.
Now let's change the opacity of the entire front group to get a nice see-through look.
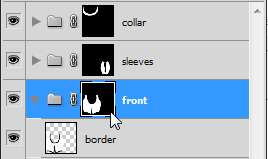 Select the front group
 Click the opacity control at the top of the layers palette.
 Slide it around to about 50%
In order to see the transparency on our model, we will need to turn off the background color layer.
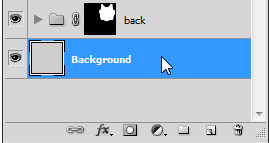 Select the background color layer and click the
  to hide the layer.
Save your image again (Save As –> F_Top001_White.png). Then switch to Sexvilla and hit  +
+ to refresh the texture.
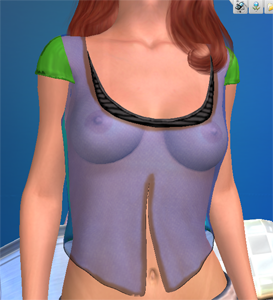 Boo-Yah! That's what I'm talking about.
Important note: In order to see transparent textures the .txf file that matches the texture needs to be set to “RGBA_8888” ”AlphaBlend”. See TXF files for more info.
Trimming the Fabric
Next, we're going to try trimming the fabric so it's a bit smaller. Transparency can also be used to “cut-away” parts of the fabric to create holes or a completely different look.
To pull this off, we will be editing the mask directly.
- Before we start, save the PSD file (file→save) so you can restore it later if you want to.
- optional: save the selection (point to a different page for this - Photoshop tips)
 Select the “front” group and click on the mask so it is highlighted with a little white box around it
 pick the brush tool and change the brush size if you need to
- paint a cut off area on the mask with black
- turn off the background layer so the transparency works
- save and view on the model
Add a masked layer of sequins
- load up the sequins image
- copy and paste above the color layer on the front
- change the blend mode to hard light
- add a layer mask
- paint it all in with black
- pick a size 45 soft brush
- set the brush opacity to 22%
- select white and paint back in some highlights

