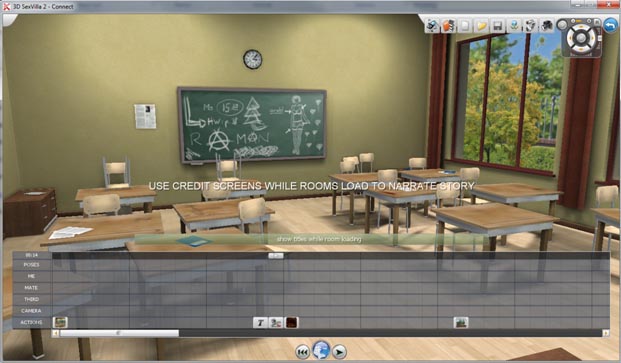
Sequencer
What is the Sequencer?
The sequencer enables you to create and record your own 3D sex stories and to watch them in the game. You can string together poses, dress and undress your models, control the camera, add titles and transitions between scenes. You can even add interactive choices to create your own sex games and branching interactive stories!
The Sequencer Interface
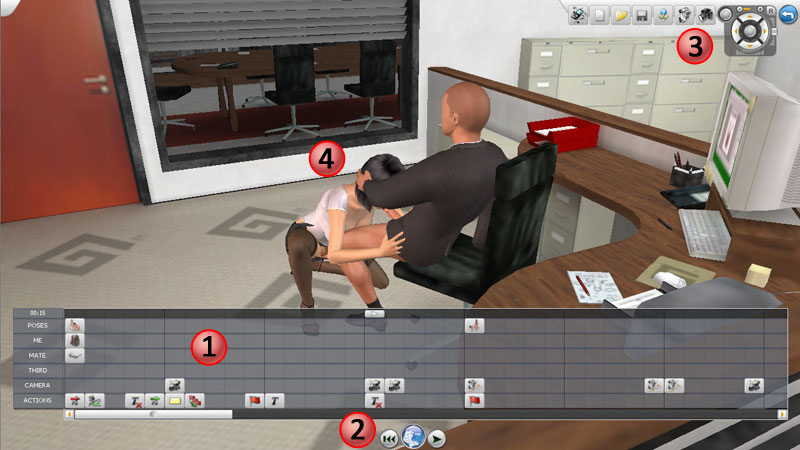
1 - Timeline - you drop your poses, cameras, titles and FX in here
2 - Playback controls. Click the (![]() ) to open the SexBrowser
) to open the SexBrowser
3 - Sequencer ToolBar and Camera Controls
4 - Hot steamy action
Where do I find the Sequencer?
- Start the Game
- Click on “New Scene”
- Click on “Sequencer”
- Select a room
- Click “Start”
The Timeline
Once you've started up the Sequencer, you will see the Timeline on the bottom of the screen.
You can drag and drop poses, cameras, titles and other goodies from the SexBrowser onto the timeline.
You can also click directly on the time line and use various pop menus
There are seven tracks in the Timeline that are reserved for different categories.
The seven lines in the scripting sequencer control various elements that will be played back when viewing the sequence:
1) POSES: Used to control what poses the characters are to use at various points in the script.
2) ME: Used to control what the ME character does at various points in the script - outfit/undressing, voice and speech bubbles, sex toy usage, orgasms etc.
3) MATE: Used to control what the number 2 MATE character does at various points in the script - outfit/undressing, voice and speech bubbles, sex toy usage, orgasms etc.
4) THIRD: Used to control what an optional THREESOME character does at various points in the script - outfit/undressing, voice and speech bubbles, sex toy usage, orgasms etc.
5) CAMERA: Used to control what camera paths, views and look at points occur within the script.
5) LIGHT: Used to adjust the lighting in the scene. It is possible to animate between light setups.
7) ACTIONS: Used for credits, titling intros and outros, subtitling text on/off and jump to points at various times in the script.
Creating a Sequence Overview
Adding Icons to the Timeline
Icons from different categories (Poses, Toys, Outfits, Emotes, Camera, and Extras) can be inserted in their respective timeline tracks.
There are two ways that you add icons to the timeline.
1) Use the Sex Browser
- Drag&Drop the Icon on the proper timeline track
- Valid timeline tracks will highlight so you can place the icon (E.g. you can only place Actions on the “Actions” track.
2) Add symbols directly onto the Timeline
![]() Left click on the timeline track where you want to add a new icon and select the icon from the menu
Left click on the timeline track where you want to add a new icon and select the icon from the menu
Fill up the different timeline tracks with icons to create your personal sex story. Once placed, icons can dragged to different locations to fine tune your sequence.
As soon as you have inserted some icons into the timelines, you can play back your sequence by pressing the “Play” button. The timeline and will be hidden during playback.
Playback Within the Timeline
To play the sequence from the current position in the timeline hit “Enter”.
To move thru longer timelines you use the slider below all 6 lines to go back and forth.
HINT: Alternately you can 'shuttle' thru timeline quickly by moving Tracker control slider arrow to far left or far right of the time counter top line slider area.
Working with the Timeline
- Left clicking on an icon in the timeline will either edit it or go to it's location in the timeline.
- Right clicking on an icon will bring up options or additional functions for that icon.
- To remove an icon from the timeline, drag&drop it over to the SexBrowser symbol. Alternately, you can right click on it and select “delete”.
- Multiple delete: Select the elements you want to delete with Ctrl + right-click and then drag them to the globus on the bottom.
- Multiple drag: Select the elements you want to drag with Ctrl + right-click and then move them to the position you want.
- Multiple copy: Select the elements you want to copy with Ctrl + right-click and then move them to the new position you want while holding Shift.
- Hint: To deselect elements right-click on a element and the selection will be cleared.
Inserting & Deleting Seconds Within the Timeline
Use the right mouse button to insert additional seconds to a timeline.
Add seconds 'globally' to all the timeline by clicking within the Tracker controller slider area at the very top of timeline (00:00 row in example image above) which adds seconds to ALL timelines.
Adding seconds within a single line in the timeline presents a slightly different time options pop-up menu.
Items effected within the timeline are shuffled in that line only without effecting other elements in other lines!
Inserting Sequences and Jump Points
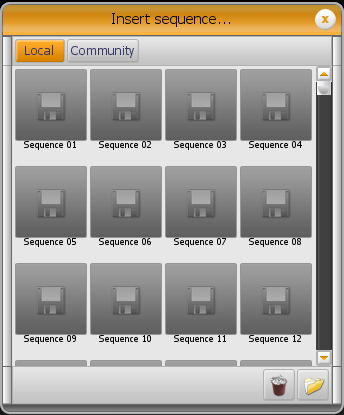
In addition, you can insert complete sequences or single timelines of sequences you have saved earlier.
Sequences can contain Jump points to create multiple choice branching and interactive storytelling capabilities! See here for more details.
Placing Additional Models in the Timeline
You can only have three characters in the timeline at any one time but you can fake more characters in your scene by swapping in other models as part of your sequence.
To add models to your sequence:
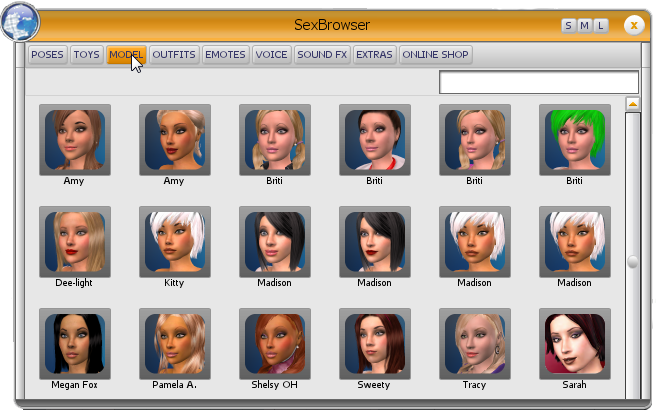
- Click on the SexBrowser icon to open it up

- Go to the “Models” tab and drag one of the models into the timeline. You can only drag them into a track that is using the same base model.
Working with Titling and Credits
Text in the sequencer uses installed TrueType fonts on your system.
There are two types of text, controlled separately, that can be placed on screen in as either titles or speech bubbles:
1) text icons used for credits & titling look like this:
'Credits' Start and Stop Icons
'Titling' On and Off Icons
2) 'Bubble' text can be presented in 3 types of bubbles a) speech b) think c) yell! and they look like this:
Selecting a Font
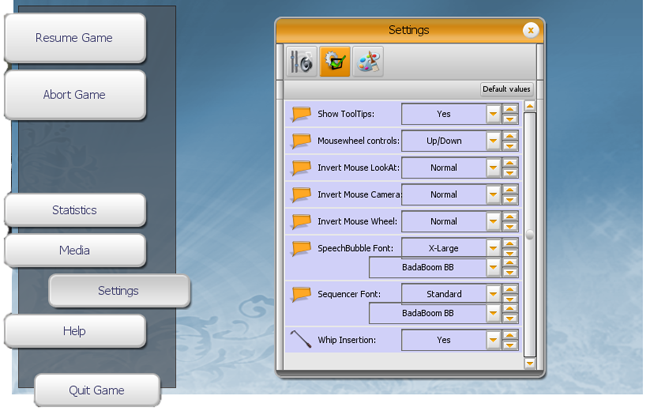
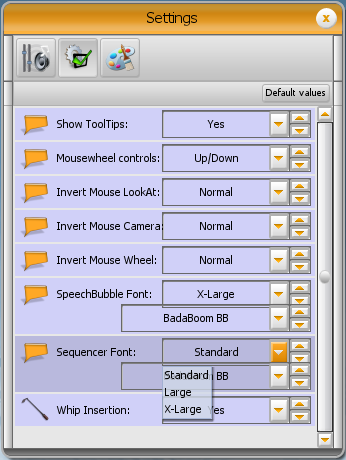
To select the font to be used in parts of a sequence in titles or bubbles go to → Settings on the main game control page
There are 3 sizes of fonts that can be selected from the drop down menu: 1) X-Large 2) Large 3) Standard
Only True Type fonts are supported, and text appears in only black and white depending on what kind of text effect has been selected!
NOTE: Availability of both upper and lower case within a font is a function of the original TTF font design itself. Some fonts only support either upper or lower case fonts and limited symbols so if you are missing items it is a function of the TTF font itself not the games text system.
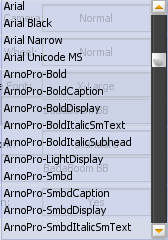
Any TTF already installed on your PC show up in a list that will pop up when selecting a new font.
HINT: You can view installed fonts on your PC by going to Control Panel → Fonts See Microsoft documentation for details and installing new fonts. You can also google 'free True Type fonts' to find ones yo can add to your system for use in-game)
Text ON-OFF Controls Concept
To use a font on screen select a starting point for it to appear in the timeline and drag and drop the 'start' icon for the type of text effect to be used.
This is typically indicated with a green highlight in the icon, text subtitle in this example
Text will remain on screen until a 'stop' display icon is inserted into the timeline where text needs to be turned off.
Depending on the type of text to be displayed a pop-up dialog box will appear on screen.
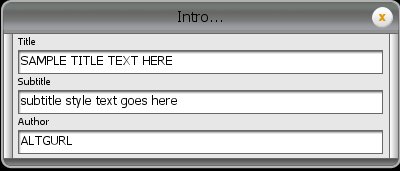
The following is the dialog box to enter text for the associated 'Credits' icon:
Text is always center justified and does not support left, right, top and bottom justifications.
NOTE:There are limits to the number of characters that can be placed in each field of the text form. It is variable and a function of the font size selected and the resolution the game is running and being played at.
Speech bubble text is assigned to individual characters in the timeline.
Speech bubbles track automatically following the character and switching dynamically to fit on screen depending on relative camera and character positions.
Entering text into a speech bubble uses the following dialog box when a bubble is clicked on in the timeline.
Carriage Returns inside the dialog box are supported if needing to manually space text. Text is center justified and the amount of text is a function of font size
Text will appear on screen until a turn off text icon is inserted in the timeline after the speech bubble.
Guide to Sequencer Icons
Working with cameras
There are two types of camera icons available in the sequencer
Basic Camera
To use the Basic Camera:
- Go to any position on the timeline (though the one you intend to place the camera at works best)
- Adjust the camera the way you want it
- Open the SexBrowser and drag the camera onto the timeline where you want the current camera angle
- Alternately: Left click in the timeline where you want to place the camera and pick “show extras → camera”
Options: (right click on icon)
- Delete: Delete this camera icon
- Free camera: smooth move to the camera to the new camera position
- Look through person ## eyes: cut to looking through person 1,2, or 3's eyes
- Disable: will do a straight cut to the new camera position
- Slider: adjust the speed of the camera move
Free Camera
To use the Free Camera:
- Go to any position on the timeline
- Adjust the camera the way you want it
- Open the SexBrowser and drag the Free Camera icon onto the timeline where you want the current camera angle
- Alternately: Left click in the timeline where you want to place the Free Camera and pick “show extras → Free Camera”
- Right click on the camera icon to set the interpolation type
Options: (right click on icon)
- Delete: Delete this camera icon
- Smooth Interpolation: Move smoothly between key positions. Works best in the middle of longer camera moves with multiple positions.
- Linear Interpolation: Move at a constant speed. Results in a rigid movement and an abrupt transition at this camera position.
- Flat Interpolation: Ease in or out of this position. Great for starting and ending camera moves. If in doubt just use this type.
- Disable: will do a straight cut to the new camera at the position of the camera icon.
Hint: For a better understanding of interpolation types see Keyframe Tangents and Interpolation
Cheat Sheet
- Flat interpolation is great for the start and end of a camera move. Is is the most predictable and easy to use interpolation type.
- If you want a smooth predicable start move from a camera position use Flat interpolation.
- If you want a smooth predicable landing into a camera position use Flat interpolation.
- If you want a move that starts or stops abruptly and moves at a constant speed use Linear interpolation
- If you want the camera to pass smoothly through a position use Smooth interpolation.
Note: Placing a Free Camera after a Basic Camera in the timeline will do a straight cut to the Free Camera without a move. Placing a Basic Camera after a free camera will move the camera but with unpredictable results. For predictable results, use one type of camera or the other.
Working With Lighting
You can adjust the lighting interactively in the sequencer and set up different light rigs for different parts of your sequence. Here's a quick guide to lighting.
To insert a lighting keyframe right click the lighting track in the Timeline and pick Show Extras → Light.
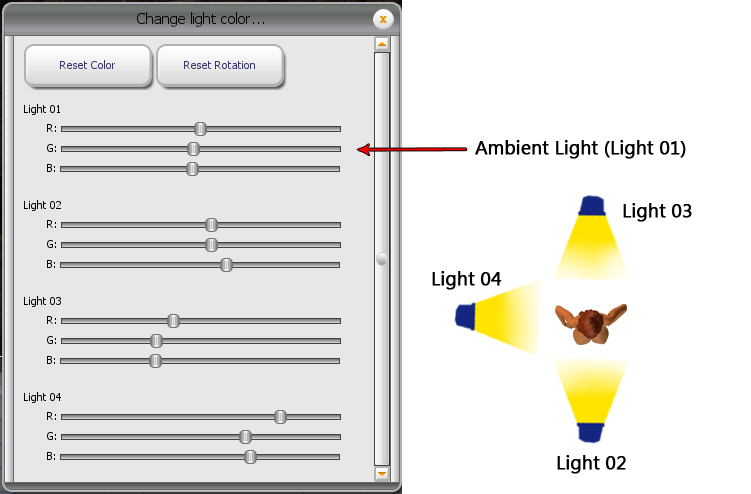
Click the lighting icon in the timeline to edit the settings. This will bring up the lighting panel.
There are four different lights in the Lighting Panel:
- Light 01 is an ambient light. This lights from all directions equally
- Light 02 is directly in front of the model (in the default model position)
- Light 03 is directly behind the model (in the default model position)
- Light 04 is located on the left side of the model (in the default model position)
You can't move the lights individually but you can rotate the lighting rig as a whole.
Recommended lighting strategy
- Start by turning all the lights off. Set the RGB sliders all the way to the left.
- Set the ambient light (light 01) to a low level. This should be the color of your darkest area or the color in shadow.
- Add the lights one at a time by adjusting the sliders to the right.
- Remember - when mixing color with light Red + Green = Yellow.
- You should generally have one light that is the primary or “key” light. It is customary to have this light slightly above the model pointing down at her. This should be your brightest light.
- The other two lights are “fill” lights. They should represent other sources of light in the room or light reflecting off of other surfaces. Their main purpose is to bring some light back into the shadow areas.
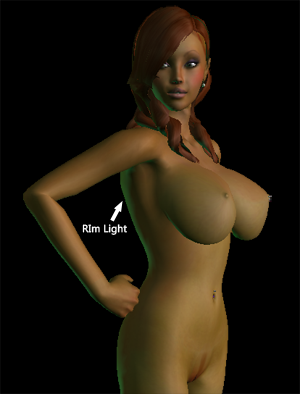
- You can also use one of the extra lights as a “Rim” light if it works with your composition. That light can be quite bright but should only catch the “rim” of the outside edge of the model. This can visually separate the model from the background and looks cool.
Creating Multi-Room Sequences
A series of different locations can be used in one sequence by using the Sequencer Room. This allows you to create more complex stories. There are some technical limitations to watch out for. All is described on the Sequencer Room page.
Creating interactive sequences
It's easy to use the sequencer to set up interactive sequences. This basically allows you to create “Choose your own sex adventure” type games.
Here's an example of setting up a simple interactive choice:
- Set up two (or three) different sections in the timeline that correspond to two (or three) different “options”
- put a “Jump Mark” icon at the start of each section
- Use an “Optional Jump” icon in the timeline where your choice will be. Set up three different questions and a jump location for each answer
- put a “Jump To” marker at the end of each sequence and point it to another spot in the timeline
This is a simple example with three choices that end up in the same place when they finish. You can make this as elaborate and branching as you like.
Here are a few ideas for sequence branching:
- picking the right choice advances while picking the wrong choice sends you back
- each sequence ends in a different place or branches again
- finishing a sequence takes you back to a “menu” where you can choose blowjob, ass fuck, straight sex, etc.
Don't forget to share your sequences on GamErotica!
Using variables in your sequence
In the “Sequencer” text fields you can use variables which will be replaced with info from the models. You can access the whole person's bio with variables. This can be useful if you are creating a sequence where you want to be able to swap in different models.
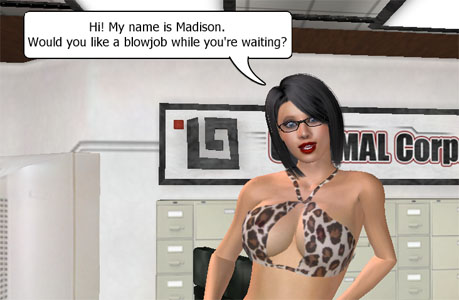
For example: Putting “Hi! My name is (#Person02Name), Would you like a blowjob while you're waiting?” in the text of a speech bubble results in:
Replace XX with the person identifier you want to address.
- (Person01Name)will be replaced with MySelf
- (Person02Name)will be replaced with SexMate
- (Person03Name)will be replaced with 3SomeMate
Full list of variables you can replace
| Variable | What it will show |
|---|---|
| (#PersonXXName) | the name of the person |
| (#PersonXXGender) | the gender of the person |
| (#PersonXXAge) | the age of the person |
| (#PersonXXNationality) | the nationality of the person |
| (#PersonXXOrientation) | the orientation of the person |
| (#PersonXXSign) | the sign of the person |
| (#PersonXXPersonality) | the personality of the person |
| (#PersonXXOccupation) | the occupation of the person |
| (#PersonXXRelationship) | the relationship of the person |
Replacing gender variables
There is also a conditional syntax for gender dependent text. It allows you to display a text part which depends on the characters gender.
The syntax is (#PersonXXGender?Text if person XX is a female|Text if the person XX is a male|Text if the person is a shemale).
Note the ? which is the condition identifier and the | as separators. You can leave a part empty but the two separators must exist!
More Examples:
Creating Multi-Room Sequences
- See The Sequencer Room for a guide to creating multi-room sequences


