This is an old revision of the document!
Pose Editor
In the Pose Editor you can create and animate poses. From single, double to threesome's - the possibilities are endless.
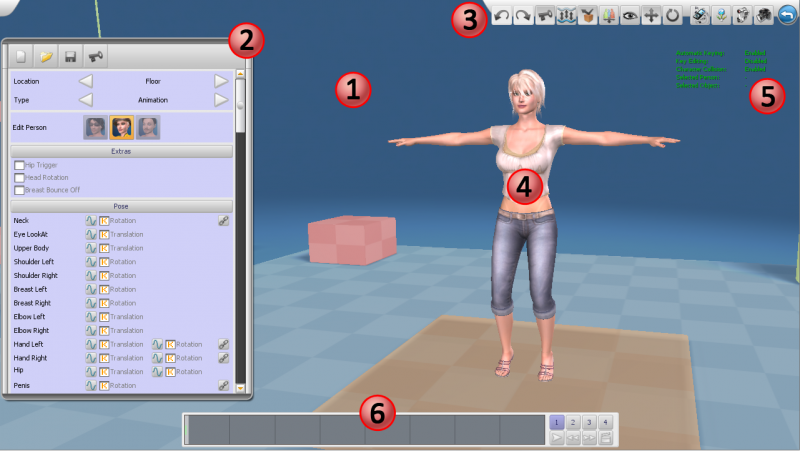
1 - 3D Scene Area
2 - Animation Panel
3 - Toolbar
4 - Model you are posing
5 - Status HUD
6 - Timeline
How to open the Pose Editor?
- Start the Game and “Login”
- Click on “New Scene”
- Click on “Pose Edit”
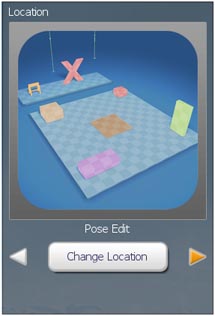
- Select the “Location” you want to edit the Poses in, or chose the Pose Edit location with standard props.
- Click “Start”
- Choose “Person” you want to pose
- Choose “Type” of pose to be edited: Interactive or animations.
- Choose “Body Part” you want to manipulate… and HAVE FUN!
Note: The 'Pose Edit' location includes standard base furniture and props that when used to create specific poses ensures the poses will be usable in all scenes.
The base furniture in this location is standardized scene to scene and location to location.
For instance if you use the chair in this location to make a 'chair pose', that pose will work on all chairs in all scenes. Likewise if a pose is made to work on a table it will work on all tables in all scenes.
Depending on how a pose is animated and the angle desired for a new location some tweaking of poses may need to be made on the spot. In-scene location spot posing allows for fine tuning of the intricate details of a generic animation to be made specific to an exact location in every detail.
The Pose Edit locations has the following standard posing props:
Everyday: sofa, table, wall, chair, floor.
Fetish: trestle, cross, pillory high, pillory low.
Tutorial Videos
Pose Editor - Basic Overview - CP
Pose Editor - Basic Toolbar - CP
Pose Editor - Basic Animation Panel - CP
Pose Editor - Tutorial 1 (Photopose) - CP
Pose Editor - Tutorial 2 (Basic Animation) - CP
Pose Editor - Tutorial (Basic Interactive Pose) - CP
Cool Things To Do in Pose Editor
Pose Editor Keyboard Shortcuts
Undo - Redo
Poses
 +
+  = Create a new single, double or threesome pose.
 +
+  = Save the current pose and thus make it available in the other game modes.
 +
+  = Open previously saved pose.
Camera
 = Set cameras lookat point to current manipulator position.
 +
+  = Set the starting camera position for the pose. It will not add a visible keyframe in the timeline
 +
+  = Set eye's lookat point to current camera position.
 = Toggle Character Collision. (makes it easier to get the camera in close)
Manipulator and Selection
 +
+  = Activate manipulator on picked part.
 = Set manipulator to translation mode if available.
 = Set manipulator to rotation mode if available.
 = Hide manipulator.
 +
+  +
+  = Increase/Decrease/Reset size of manipulator.
 +
+  = Set panel to display numeric values (pressing again switches back).
Animation
 = Toggle automatic keying.
 +
+  = Toggle key editing.
 = Manually set keys at current frame.
 = Jump to next key in timeline.
 +
+  = Jump to next frame in timeline.
 = Jump to previous key in timeline.
 +
+  = Jump to previous frame in timeline.
 = Jump to start of current timeline section.
 = Jump to end of current timeline section.
 +
+  /
/  /
/  /
/  = Switch to timeline section 1,2,3 or 4.
 = Start/Stop animation preview.
Taking Pictures
 +
+  = make a screenshot.
 +
+  +
+  = make a hires screenshot.
 +
+  +
+  = make a screenshot on green background.
 +
+  = start and stop video recording.
Lighting
 or
or  +
+  = rotate the light around a vertical axis one way or the other.
 +
+  or
or  +
+  +
+  = rotate the light around a horizontal axis one way or the other.
Display
 +
+  +
+  = disable/enable GUI.
 +
+  +
+  = toggle the room visibility.
 +
+  +
+  = disable/enable mouse cursor.
 = Show/Hide pick-boxes.
Pose Editor - Control Panel Overview
The Pose Editor UI allows control of every aspect of animating sexy poses for 1 to 3 characters.
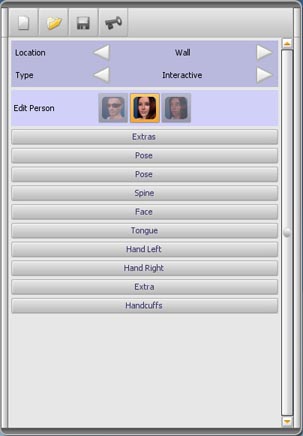
The main dialog allows for selection of the location of a pose and type.
User Interface
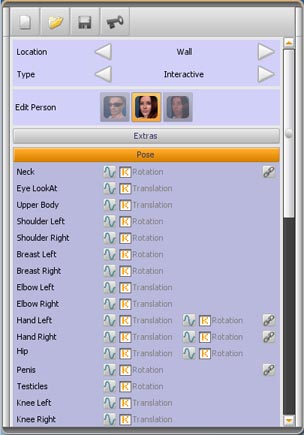
The UI uses a collapsible menu system that expands the dialog box to show more granular controls for each section.
For extended list of controls use side bar slider to view complete lists.
Selecting a Body Part
Once a panel is open adjustments can be made.
When the panel is closed the changes are saved.
Undo and Redo can be performed at any time to revert back to a previous position.
There are two methods to choose body parts to manipulate.
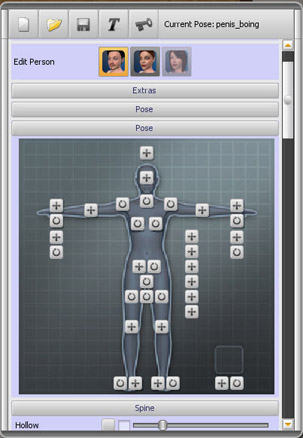
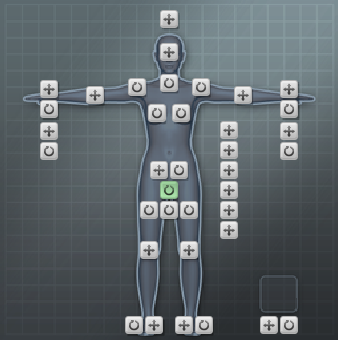
By selecting different body part icons on the different body areas on the mannequin different controls will pop-up on screen to allow that part to be maneuvered.
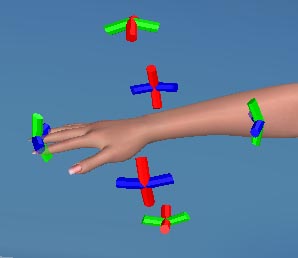
Body parts that can be manipulated can be chosen on the mannequin by either of the cross or circular icons.
NOTE: Some body parts can only be changed using either one or the other of the 'translation' or 'rotation' modes but not both.
a) Translation uses the 'cross' symbol icon, b) Rotation uses the 'circular' symbol icon.
3D Space 'X-Y-Z' Movement Basics
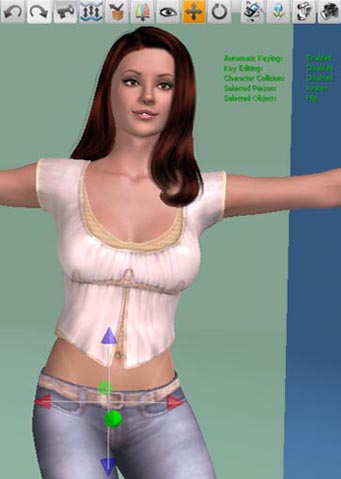
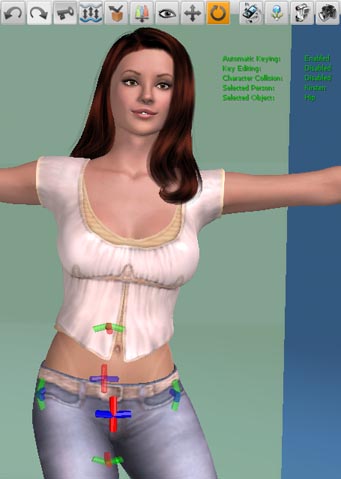
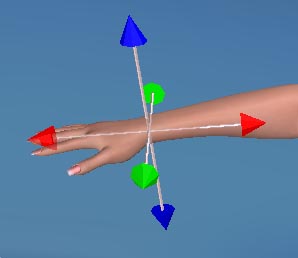
Once a body part is selected and one of the two types of controls has popped up hovering on the colored targets on the control then clicking allows for X-Y-Z manipulation.
NOTE: The 'translation' and 'rotation' mode controls change 'shape' and function when chosen and alternated between.
Colored target areas corresponding with the X-Y-Z axises can be manipulated with the mouse by moving in the corresponding basic directions:
X Axis = left and right
Y Axis = up and down
Z Axis = back and forth
Clicking on the red-blue-green parts of the controls and then holding and dragging will create different behaviors with mouse movements.
Fine Tuning 'X-Y-Z' Positions
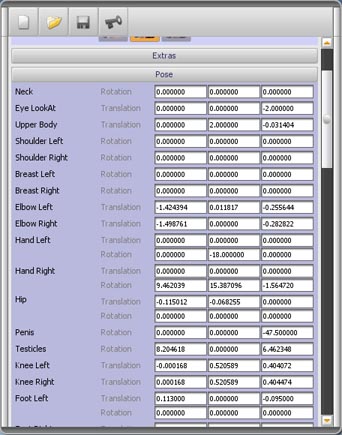
If precise control is required for a pose when on Method 1 Pose view use CTRL=A to toggle between the standard UI and details dialog box.
The details form has 3 columns corresponding to X-Y-Z and numerical data in each field.
To fine tune a position of a selected body part enter new data
By selecting different body part icons on the different body areas on the mannequin different controls will pop-up on screen to allow that part to me maneuvered.
TIP: use the interactive controls to get the part as close as you can and fine tune the numbers only if you need to be more precise.
Experimentation and watching the tutorials is the best way to get a handle on the animation panel. ENJOY!
See the Animation Panel tutorial to see these controls in action.
The Pose Editor Timeline
The timeline uses key frame animation techniques to make basic or interactive animations.
There are two types of animation that can be created. A “basic” animation is a straight playback of the animation while an “interactive” animation allows the user to interact with the model and control the animation playback. E.g. by putting their mouse on the hips of a character and moving back and forth to control the thrusting action.
Keyframe Indicators by Character
Each individual character is represented by a different color 'bar' in the timeline
Green Bars - Main Character = SexMate
Red Bars - Second Character = MySelf
Blue Bars - Third Character = 3SomeMate
Filtering Keys in the Timeline
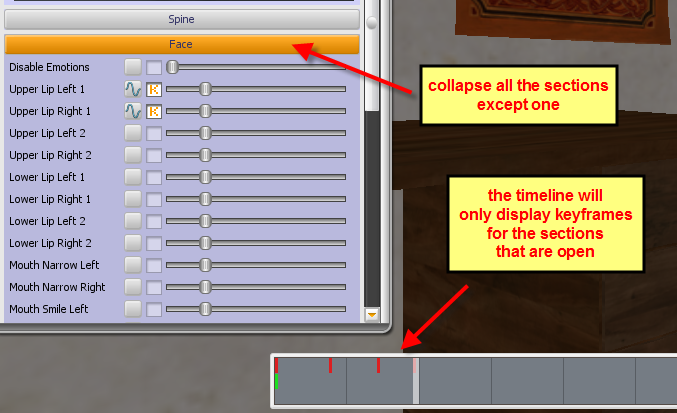
You can filter the keys displayed in the timeline by closing sections that you don't want to see. E.g. if you close all the sections except for the “Face” you will only see the face keyframes displayed in the Timeline. This can be really useful when you want to adjust the timing of just one type of animation.
Animated vs Interactive
The timeline has 2 different modes depending on the type of animation to be created or edited.
Type 1: Animation
A basic 'animation' is just one long timeline split into 4 sections. The animation will play from the start to the last keyframe and then loop back to the start again. For Example:
- If you just create one new keyframe at the end of section 4, all 4 sections will be played in order (1-2-3-4).
- If you only create one somewhere in section 3, it will play section 1,then section 2, then section 3 up to the last keyframe and start over.
Type 2: Interactive
In this mode the 4 sections contain 4 different animation loops that are triggered under different conditions. The 4 numbered sections are initially set up to each contain a colored loop but they can be redefined to accomodate loops of different lengths.
The Different Sections
In Interactive Mode the 4 sections are initially setup to contain the 4 different loops.
By rightclicking in the timeline you can set the Start/End of each individual loop. So, for example you could set the end of the Normal Loop to the end of section 3 and cramp the remaining loops into section 4. Just be careful not to overlap the different loop sections.
Green Section - Normal Loop: This is the loop which is played initially, up to the point where a person reaches his/her orgasm.
Red Section - Orgasm Loop:
When a person reaches an orgasm and this loop exists (you don't have to create one), this loop will be played. It will be played at least once, but if by chance you get a multiorgasm, it will be looped.
Blue Section - Cooldown Loop:
After the orgasm, the cooldown loop will be played until excitement reaches a certain level. Then everything will start over with the Normal Loop.
Grey Section - Penetration Loop:
This is a special loop that will play as soon as a user interacts with a person or sets the speed slider above zero within the game. See the Interactive pose tutorial for a demonstration.
Only items linked to 'interactive' targets will be animated by this loop and at the same time override all other animations on those targets.
Find a list of targets in this post: http://www.gamerotica.com/forums/viewtopic/t/1487
Basic Interactive Pose tutorial: http://www.gamerotica.com/video/view/285-pose-edit-tutorial-3-basic-interactive-pose
The Key Editor
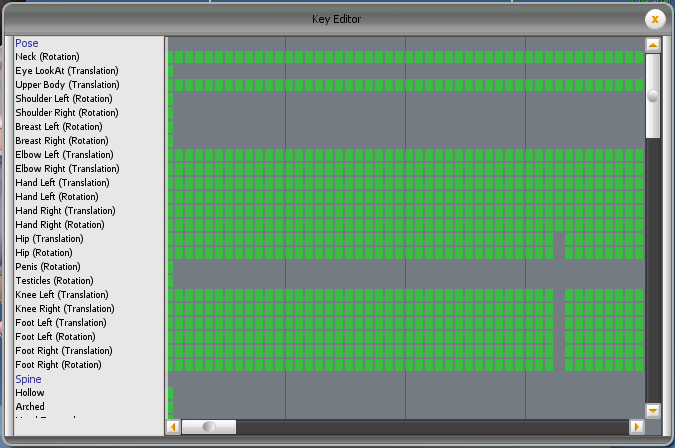
The Pose Editor includes an advanced key frame editing window called the Key Editor. This window displays all the key frames on the selected model in a grid format.
For a full description of how to use the Key Editor click here
Tagging Poses
Poses can be tagged in the Pose Editor. Tagging poses allows people to find them more easily when you share them on GamErotica.
To Tag a Pose in the Pose Editor
- Load an existing pose or create and save a new pose
- Click the “T” button at the top of the Pose Editor
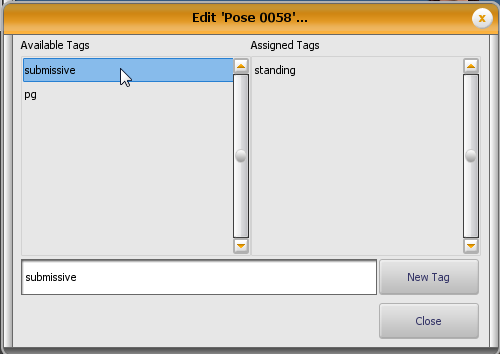
- Add new tags or assign existing tags. Click on Available tags to assign them or Assigned tags to remove them.
- The tags will be assigned to the pose. You don't need to re-save the pose.
